AI TL;DR
Learn how to turn your ideas into 3D printable figurines using AI tools like Meshy. From text prompts to physical prints, this complete guide covers the entire workflow.
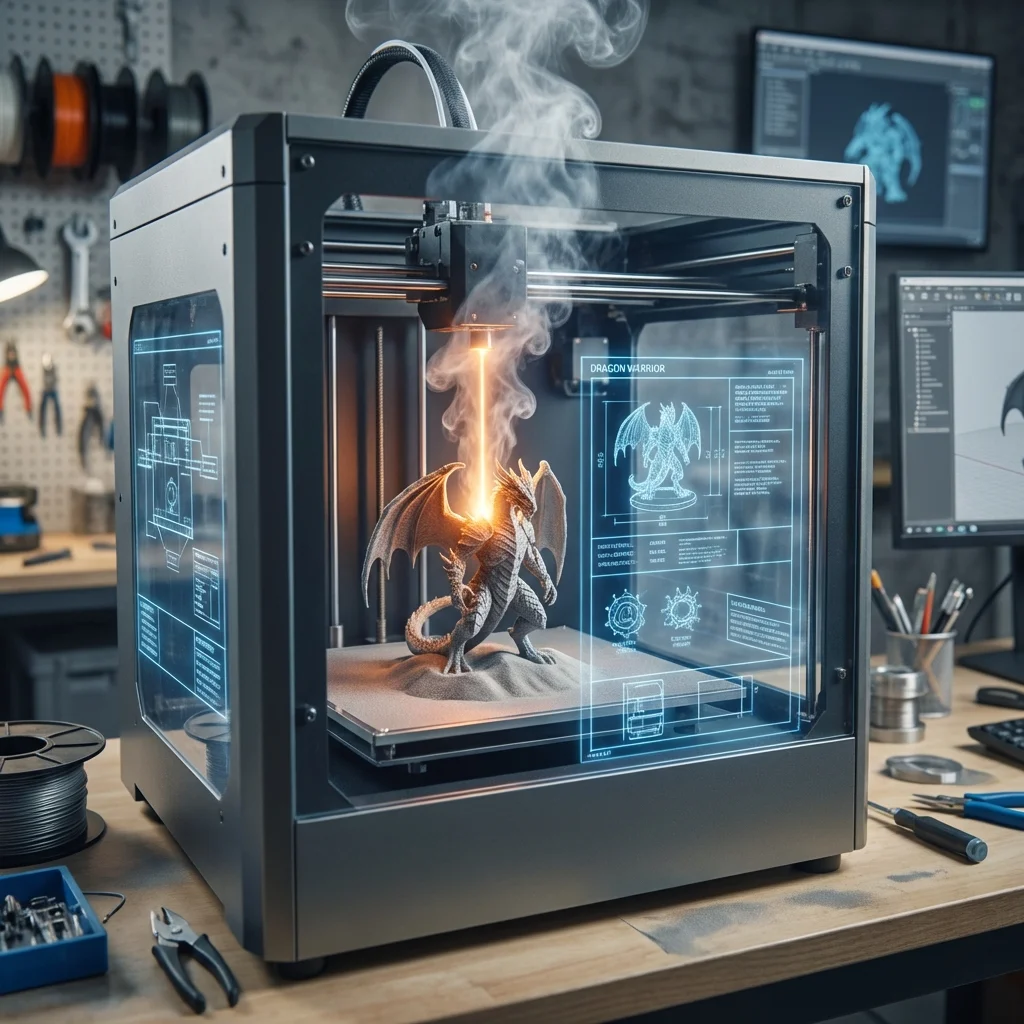
How to Create Custom 3D Printed Figurines with AI: A Step-by-Step Guide
Creating custom 3D figurines used to require years of 3D modeling experience. Now, AI tools like Meshy can turn a text description or image into a print-ready 3D model in minutes. This guide walks you through the complete process—from idea to physical figurine.
What You'll Learn
- How to use AI to generate 3D models from text or images
- Optimizing AI models for 3D printing
- Preparing files for your printer
- Printing tips for figurines
- Post-processing for professional results
Tools You'll Need
AI 3D Generation
Meshy (Primary recommendation)
- Text-to-3D and Image-to-3D generation
- Direct STL/3MF export for 3D printing
- Free tier available, paid plans for higher quality
- Website: meshy.ai
Alternatives:
- Luma AI (video and image focus, but has 3D)
- CSM.ai (character-focused)
- Tripo AI (high-detail models)
3D Printing
Printer Options:
- Resin printer (recommended for figurines): Elegoo Mars, Anycubic Photon, Phrozen
- FDM printer (budget option): Creality Ender 3, Bambu Lab A1
Slicer Software:
- Chitubox (resin)
- Lychee Slicer (resin)
- PrusaSlicer (FDM)
- Bambu Studio (Bambu printers)
Post-Processing
- UV curing station (resin)
- Sandpaper (various grits)
- Primer and paints
- Clear coat
Part 1: Generating Your 3D Model
Method 1: Text-to-3D
The simplest approach—describe what you want, and AI generates it.
Step 1: Sign Up for Meshy
- Go to meshy.ai
- Create a free account
- You'll get free credits to start
Step 2: Write an Effective Prompt
Good prompts make all the difference. Here's the structure:
[Subject] + [Style] + [Details] + [Quality modifiers]
Basic Example:
A knight in full plate armor holding a sword
Better Example:
A medieval knight in ornate plate armor, holding a longsword,
standing in a heroic pose, detailed engravings on the armor,
flowing cape, fantasy style, high detail, clean topology
Expert Example:
A fantasy dwarf warrior, muscular build, braided beard with
metal rings, wielding a massive double-headed battle axe,
wearing runic-inscribed iron armor, standing on a rocky base,
tabletop miniature style, high detail, crisp edges,
optimized for 3D printing
Prompt Tips for Printable Models:
✅ Do include:
- "Standing on a base" (adds stability)
- "Solid construction" (reduces hollow areas)
- "Tabletop miniature style" (optimizes for small prints)
- "High detail, crisp edges"
- Specific poses that are print-friendly
❌ Avoid:
- Floating elements (wings that don't connect)
- Very thin features (will break)
- Complex interlocking parts
- Extreme overhangs
Step 3: Generate and Iterate
- Click "Generate" and wait 1-2 minutes
- Meshy produces 4 variations
- Select your favorite
- Click "Refine" for higher detail version
- Rotate the model to check all angles
Quality Settings:
- Preview mode: Fast, lower detail
- High-quality mode: Slower, print-ready detail
Method 2: Image-to-3D
Turn concept art, photos, or sketches into 3D models.
Step 1: Prepare Your Image
Ideal image characteristics:
- Clear, uncluttered subject
- Good lighting
- Character/object fully visible
- Neutral background preferred
- Front-facing or 3/4 view works best
Image sources:
- AI-generated concept art (Midjourney, DALL-E)
- Character drawings
- Photos of sculptures or toys
- Game character screenshots
Step 2: Upload and Generate
- Click "Image to 3D" in Meshy
- Upload your image
- Add optional text to guide the generation
- Generate and review results
Pro tip: If the back of the model looks wrong, generate a back view image and use Meshy's multi-view feature.
Step 3: Multi-View for Accuracy
For complex characters:
- Generate front, side, and back view images
- Use Meshy's multi-view Image-to-3D
- Upload all views
- AI creates a more accurate 3D model
Method 3: AI Texturing Existing Models
Already have a 3D model but need textures?
- Upload your existing 3D file
- Describe the textures you want
- Meshy applies AI-generated textures
- Download with PBR maps (diffuse, roughness, metallic, normal)
Part 2: Preparing for Print
Exporting Your Model
Meshy supports multiple formats. For 3D printing:
Recommended formats:
- STL: Universal, works everywhere
- 3MF: Better for color printing, includes more metadata
- OBJ: Good for editing in other software
Export steps:
- Click "Download" on your finished model
- Select STL or 3MF format
- Choose appropriate polygon count
Checking Model Quality
Before printing, verify your model is watertight (no holes).
Free tools for checking:
- Microsoft 3D Builder (Windows) - auto-repairs
- Meshmixer (cross-platform) - analysis and repair
- NetFabb (online) - professional repair
Common issues to fix:
- Non-manifold edges (holes in the mesh)
- Inverted normals (inside-out faces)
- Intersecting geometry
- Thin walls that won't print
Scaling Your Model
Most AI-generated models come at arbitrary sizes.
For tabletop miniatures (28-32mm scale):
- Typical human figure: 28-32mm tall
- Heroic scale: 32-35mm tall
- Large creatures: 50-75mm tall
Scaling in your slicer:
- Import the model
- Measure current height
- Scale uniformly to target size
- Check that details are still visible at new size
Minimum detail rule: Features smaller than 0.3mm won't print well on most resin printers.
Adding Supports (Resin Printing)
AI models often have overhangs that need support structures.
Auto-support tips:
- Orient model at 30-45° angle for best results
- Use light or medium supports for figurines
- Place supports on less visible areas (back, underside)
- Increase support density for heavy overhangs
Manual support areas to check:
- Weapons (swords, staffs)
- Extended arms
- Capes and cloaks
- Character bases
- Facial features
Hollowing (Optional)
For larger prints, hollowing saves resin and reduces print time.
When to hollow:
- Models larger than 40mm
- Solid models with thick sections
- When resin cost is a concern
Hollowing settings:
- Wall thickness: 2-3mm minimum
- Add drain holes (2-3mm) at the bottom
- Keep structural areas solid
Part 3: Printing Your Figurine
Resin Printing (Recommended)
Resin printers produce the best detail for figurines.
Recommended settings for figurines:
- Layer height: 0.03-0.05mm (30-50 microns)
- Exposure time: Per resin manufacturer specs
- Bottom layers: 6-8 layers at 2-3x normal exposure
- Lift speed: Slower is safer for detailed models
Resin recommendations:
- Standard grey: Good for painting, shows detail well
- Water washable: Easier cleanup, slightly less detail
- ABS-like: More durable, good for gaming pieces
FDM Printing (Budget Option)
FDM can work for larger figurines or prototypes.
Optimized settings:
- Layer height: 0.1-0.12mm
- Nozzle: 0.3-0.4mm
- Print speed: Slower (30-40mm/s) for detail
- Infill: 15-20% for figurines
- Supports: Tree supports work well for characters
Best FDM results:
- Print at larger scale (50mm+)
- Use quality filament (Overture, Hatchbox, Prusament)
- Consider resin printing for faces and details
Print Time Estimates
| Figurine Size | Resin (0.05mm) | FDM (0.12mm) |
|---|---|---|
| 28mm mini | 2-3 hours | 1-2 hours |
| 50mm character | 4-6 hours | 3-4 hours |
| 100mm display | 10-14 hours | 6-8 hours |
Part 4: Post-Processing
Resin Post-Processing
Step 1: Wash
- Remove print from build plate
- Wash in 91%+ isopropyl alcohol (or water for washable resin)
- Use two-stage wash: dirty tank first, clean tank second
- 3-5 minutes per stage
- Let fully dry before curing
Step 2: Cure
- UV cure in curing station
- 3-5 minutes per side
- Don't over-cure (causes brittleness)
Step 3: Remove Supports
- Use flush cutters for bulk removal
- X-Acto knife for cleanup
- Work carefully around fine details
Step 4: Sand (Optional)
- 400-grit for rough spots
- 600-800 grit for smoothing
- 1000+ for near-mirror finish
- Wet sanding reduces dust
FDM Post-Processing
Removing Supports
- Needle-nose pliers for bulk
- X-Acto for cleanup
- Heat gun can help with stubborn supports
Smoothing Options
- Sanding: 200 → 400 → 600 grit progression
- Filler primer: Spray, sand, repeat
- Acetone vapor (ABS only): Chemical smoothing
- 3D printing pens: Fill gaps and add details
Painting Your Figurine
Even unpainted, AI-generated figurines look impressive. But painting takes them to another level.
Basic Painting Setup
- Primer (grey or black depending on scheme)
- Acrylic paints (Vallejo, Citadel, Army Painter)
- Brushes (sizes 0, 1, 2, dry brush)
- Palette and water cup
- Matte varnish for protection
Painting Workflow
- Prime: 2-3 thin coats of primer
- Base coat: Block in main colors
- Shade: Apply wash to recesses
- Layer: Build up highlights
- Detail: Eyes, small features
- Varnish: Protect your work
Beginner-Friendly Approach
- Prime grey
- Paint main colors
- Apply all-over wash (Agrax Earthshade or similar)
- Dry brush highlights
- Pick out details
- Matte varnish
Part 5: Complete Workflow Example
Let's create a character from start to finish.
The Goal
A fantasy wizard figurine for tabletop gaming.
Step 1: Generate the Model
Meshy prompt:
An elderly wizard with long flowing robes, holding a gnarled
wooden staff topped with a glowing crystal, long beard,
pointed hat, standing on a stone base, tabletop miniature
style, fantasy RPG character, high detail, print-ready
Settings:
- Model type: Character
- Quality: High
- Art style: Fantasy
Result: 4 variations in ~90 seconds
Step 2: Refine and Export
- Select best variation
- Request high-quality refinement
- Check model from all angles
- Download as STL
Step 3: Prepare in Slicer
- Import into Chitubox/Lychee
- Scale to 32mm (measured to top of hat)
- Orient at 35° angle
- Add auto-supports
- Check and add manual supports to staff and hat brim
- Hollow at 2.5mm thickness with drain holes
Step 4: Print
- Printer: Elegoo Mars 3 Pro
- Resin: Elegoo Standard Grey
- Layer height: 0.04mm
- Print time: ~4 hours
Step 5: Post-Process
- Wash 5 minutes in IPA
- Cure 4 minutes per side
- Remove supports with flush cutters
- Light sanding on support marks
- Prime with grey primer
Step 6: Paint
- Base: Robes in deep blue, staff brown, beard grey
- Wash: Overall with dark tone
- Highlight: Dry brush robes lighter blue
- Details: Crystal in cyan, eyes, belt buckle gold
- Varnish: Matte finish
Total time: ~6 hours including printing Traditional modeling time: 20+ hours
Troubleshooting Common Issues
AI Generation Issues
| Problem | Solution |
|---|---|
| Model looks blob-like | Add more specific details to prompt |
| Wrong style | Include style keywords (realistic, cartoon, miniature) |
| Missing features | Generate from image instead of text |
| Bad back of model | Use multi-view generation |
Print Issues
| Problem | Solution |
|---|---|
| Print failed | Check supports, increase exposure |
| Missing details | Reduce layer height, check model quality |
| Warping | Ensure proper curing, check resin temperature |
| Thin parts broke | Thicken in model or add supports |
Quality Issues
| Problem | Solution |
|---|---|
| Layer lines visible | Lower layer height or post-process |
| Support marks | Place supports on hidden areas, sand carefully |
| Rough surface | Check resin exposure, use quality resin |
Cost Breakdown
Per-Figurine Costs
28mm miniature:
- Meshy credits: ~$0.10-0.50
- Resin: ~$0.30
- Paint/supplies: ~$0.20
- Total: ~$0.60-1.00
Compare to commercial minis: $5-15 each
Startup Investment
| Item | Budget | Mid-Range | Premium |
|---|---|---|---|
| Resin printer | $150 | $300 | $600 |
| Wash & cure station | $50 | $100 | $150 |
| Resin (1L) | $25 | $35 | $50 |
| Tools & supplies | $30 | $50 | $100 |
| Meshy subscription | $10-30/mo | $10-30/mo | $10-30/mo |
| Total startup | ~$265 | ~$495 | ~$930 |
Advanced Techniques
Creating Matching Sets
For armies or collections:
- Generate base character
- Use Meshy's "Create Similar" feature
- Modify prompts slightly for variations
- Maintain consistent style keywords
Combining AI Models
- Generate multiple components separately
- Import into Blender or similar
- Combine and pose
- Export as single print-ready file
Batch Printing
- Generate multiple models in Meshy
- Arrange on single build plate in slicer
- Print full plate at once
- Maximize efficiency
Conclusion
AI has democratized 3D figurine creation. What once required years of 3D modeling expertise now takes minutes with the right prompts. The quality isn't perfect—hand-sculpted models from professionals are still superior—but for hobbyists, game designers, and creators, AI 3D generation is a game-changer.
Key takeaways:
- Good prompts are essential—be specific and detailed
- Meshy exports print-ready formats (STL, 3MF)
- Resin printers produce the best figurine quality
- Post-processing and painting elevate results significantly
- Cost per figurine is dramatically lower than commercial alternatives
Start with simple projects, learn the quirks of your printer and AI tools, and gradually tackle more complex designs. Your first print might not be perfect, but you'll improve rapidly—and you'll be creating custom figurines that exist nowhere else in the world.
The barrier between imagination and physical object has never been lower. AI text-to-3D turns ideas into models in minutes, and affordable resin printers turn those models into tangible figurines. Whether for gaming, collecting, or gifting, custom 3D printed figurines are now accessible to everyone.